Broadway Bears: Carrie Fisher's Wishful Drinking Bear

The Great White Way has a lot to offer, but one more contribution that may surprise the uninitiated is Broadway Cares/Equity Fights AIDS charity. Drawing on the star power and talents of various New Yorkers, they raise money though such unique events as the upcoming Broadway Bears Auction (not to be confused with their fundraising strip show, Broadway Bares).

One bear appearing on the auction block this year has a NewNew connection, since it was made by Kari Love of Ikyoto.


The bear of the hour represents Carrie Fisher in her hit one-woman show, Wishful Drinking. Perhaps inspired by a combination of her 2009 Conan O'Brien appearance as the liberator of the masturbating bear and the proliferation of dolls made of her in the past (noted in the show itself), Ms. Fisher was eager to have a bear in her likeness.


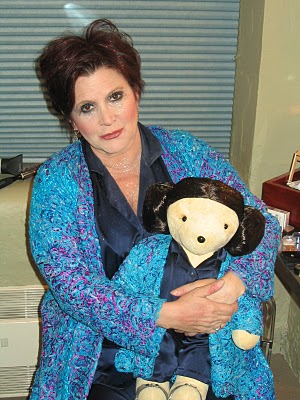
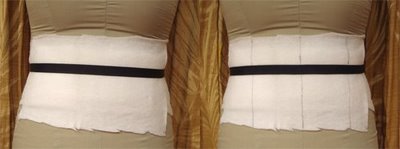
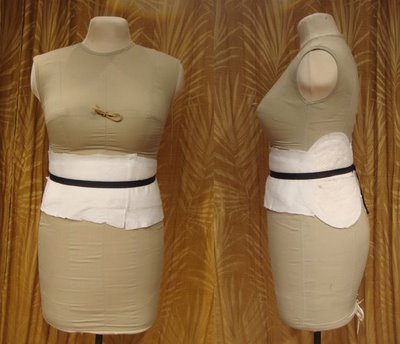
The bear features a "Gypsy Lace" duster of assembled and sewn fibers creating a web-like texture of yarns made by Diane Prekup, who also made the original. Underneath, she wears midnight blue silk charmeuse pajamas cut from remnants of the original Broadway garments with a pocket filled with confetti from the show. Her sandals feature silver leather straps adorned with Swarovski crystal beads. Her wig is a reproduction of her famous Princess Leia hairstyle. She has also been signed by Carrie Fisher.

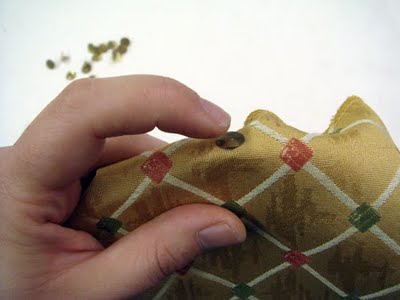
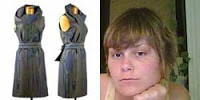
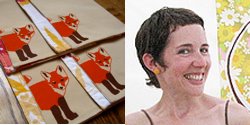
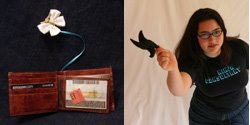
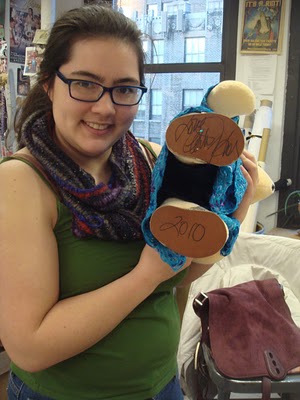
(Kari proudly shows off the signature on the bear.)

You can make a bid online until the auction on February 14, 2010, or even by phone during the event if you can't attend.

~Kari
http://ikyoto.etsy.com

How-To IKEA Hack: Circular Bulletin Boards

Sometimes you need a quick and easy handmade gift (or to restyle your own desk or studio space), so here is a simple IKEA hack that takes less than an hour and under $5.

Trivet to Bulletin Board


You will need:
IKEA's "Heat" Trivets ($2.99 for the set)
Attractive flat thumbtacks
Scrap fabric larger than the trivets
Glue (I used Magna-Tac, but Tacky glue or hot glue would be good choices)
A drill with large drill bit

First, drill a large hole in each piece of cork about 1" from the edge. These holes need to be large enough for hanging your finished board by either a nail or a push pin.

Next, push your thumbtacks through the fabric along the narrow edge of the cork. Pull the fabric as you go to make a taut and smooth surface on the face of the bulletin board. You will get the best results if you add the tacks evenly with each tack opposite to the one you put before (see example starting order below).
Fill in this pattern until your edge is completely covered with thumbtacks.

At this point, your bulletin boards should look like this.

Flip over your bulletin board, and trim excess fabric to about 1" all the way around.
Glue down the excess fabric around the back. Allow to dry.
You're finished! Here are the three coordinating bulletin boards I made for this tutorial.
Hope you enjoy making this quick project, and please link to photos of your finished bulletin boards or comment to share variations that you come up with.

~Kari
http://ikyoto.etsy.com

craft on draught!


last thursday, i attended a really fun crafting event: the first craft on draught night at spacecraft in south williamsburg. with me were two other {newnew} refashioners: kayte of this is love forever and kari of ikyoto.

craft on draught is a series of crafting parties, co-sponsored by the {newnew}, that promise "the ultimate happy hour of destruction, reconstruction, and social mixing!" as you can see here, it was just that:

your admission fee gives you access to a huge heap of awesome donated fabric and clothes, tons of trimmings, and all the tools and supplies you could desire, from needles and thread to hot glue guns. some people used all these goodies to give new life to old clothes, while others chose to create entirely new garments.

here's me with kayte and kari and our creations:

i turned my old mock-turtleneck sweater into a cardigan with the help of a giant button and some reverse applique. kayte gave a stripey dress some sequin-infused appliques made from a gorgeous marimekko print. kari took a shirt and some coordinating fabric and put them together to make a cropped summer cardigan. do you see the horse print on that shirt? there really were some amazing materials to work with. we ripped, we sewed, we laughed, we drank pbr. all in all, the perfect night.

hope to see you there for the next one. it will be at 3rd ward on thursday may 7th, and will focus on felting old wool clothing. come and catch the refashioning spirit!


- cakehouse

Wardrobe Refashion: How-to Make Your Dress Form Look Like You (Only Better)

Although I have a pile of clothes waiting to be refashioned and an equal stack of fabric that could become cute new outfits, first things first. My kick-off project was to tackle getting my dress form ready to roll. Since it is a task that many home sewers might not have a lot of experience with, here is some professional advice to guide you. This process is different from making an exact replica of your body. Instead, this form yields clothing that not only fits, but also flatters.
Here is my dress form. Unsurprisingly, it has great proportions and a very standard figure. Very few people in the world will find their measurements to be the same as their dress form, no matter how fabulous we all know we look!
At this point, it is time to make direct comparisons. Take thorough and accurate measurements of your over-bust, bust, under-bust, waist, high and low hip, and those of your form. This is not the part where we flatter ourselves. This process is meaningless without total honesty. Establish where you and the form differ and by how much. In my example, the form and I are the same except for the waist.
You'll need various forms of padding (e.g. shoulder pads, bust pads, and batting) to pin onto your form. The most effective way to pin them is by using straight pins with the length nearly flat to the form, and the tip pointing towards the center of your pad.

The #1 trick of padding a stand is making the measurements the same as your own, but doing so by putting the extra where you wish it was.

If your bust measurement is bigger, try putting the padding on the breasts. If your hip measurement is bigger, add it to either your butt or sides depending which you think looks more pleasing. Even if you carry most of your extra waist in the front, spread it around to give a more even silhouette.

Here is an example with padding added to the breast using a commercial bust pad.This one is for adding a little extra lift to the butt area to extend the hip measurement using two shoulder pads with flat edges together.
Here are the steps I took in my own case. First I used two thin shoulder pads in the small of the back. Then two sets of thick shoulder pads to either side. The tapering edges of the pads help smooth out the shape to keep from having big jumps in size.
Next I used a folded piece of batting directly in the waistline to help bulk it up more. Then I used a single layer of batting to assure the smooth transition to the rest of the form.
The measurements all matched at this point, so I added a ribbon to mark the new waist. Using a Sharpie, I extended my center front and princess lines onto the padding.
The form is now precisely my measurements and will make a dress that fits my body. By fudging the placement, the added bonus is any clothes made on this stand will be well proportioned, which ultimately makes me and my projects look even better.


~Kari
http://ikyoto.etsy.com

NewNew Takes On The Wardrobe Refashion Challenge

I'm excited to introduce a new weekly feature to the {NewNew} blog. For the next six months participating members have committed to buying only handmade, used, and vintage clothing and challenge themselves to make or refashion items themselves. This project was inspired by and running in conjunction with the original Wardrobe Refashion Challenge. You will be able to follow our journeys here, along with associated how-to projects and guest refashionistas.

The Challengers (in their own words):

Beacon Bookmarks
Now that I split my time between the woodshop making our bookmarks and an office job, I don't always have to dress like a hobo. My wardrobe seems to be inspired by the Target clearance rack and I would love to add some individuality to what I have (especially the well-loved worn out pieces) plus use up some of my large fabric stash. The hard part is deciding what to do first!

Better Than Jam
I always think it is such a waste to just throw old clothes out. I am a huge believer in giving items several lives.


Cakehouse

i joined wardrobe refashion two years ago, and though i stopped posting after my first six months, i've kept up the pledge. the wardrobe refashion community actually helped inspire me to create my business, making home accessories out of repurposed secondhand fabrics.


Ikyoto
I'm Kari (aka Ikyoto), and after looking in my closet I have found it wanting. Rather than head to the chain stores, I'm planning on taking a creative adventure and supporting artisans whose values I share.


Joyella
Jennifer has been a long time proponent of fair trade and sweat shop free products, and has been shopping with these ethics in mind for several years, but this will mark the first attempt at such an absolute commitment to these ideals! She is excited for the challenge, and looks forward to sharing her experiences.


Karen's Monsters
I'm Karen of Karen's Monsters. The more involved I've become in the handmade movement, the more I've come to appreciate well-made goods that have a positive impact on our environment and communities. I'm looking forward to the challenge and hoping to extend this project into a lifetime habit.

Luck (x4)
Tanya has been sewing and making her own clothes since Jr. High (with photos of some bad 80's outfits to prove it). She also loves hunting for vintage clothes, fabric and (especially) patterns. She's always been more of a "make from scratch" kind of girl rather than a "re-fashioner" but is hoping to do a little of both while participating in this project.

The Pledge

6 month pledge
We, the {NewNew} Refashion members, pledge that we shall refashion, renovate, recycle pre-loved items for ourselves with our own hands in fabric, yarn or other medium for the term of our contract. We pledge that we will share the love and post a photo of my refashioned, renovated, recycled, crafted or created item of clothing on the Wardrobe Refashion blog, so that others may share the joy that thy thriftiness brings!
Signed {NewNew} Refashion Members.

Check back next week for our first installment!


~Kari
http://ikyoto.etsy.com

Alternative Cake Toppers by the NewNew

The old plastic-cast figurines have largely been tossed aside for cake toppers that better capture the unique nature of the wedding couple's personalities. Here are a few ideas from the NewNew for fresh and personal looks to dress up your cake.

What could be more sweet than the beloveds' names stitched out simply together? MiniatureRhino offers custom embroidery that brings your names and hearts into one that could go on top of your cake, and then into your home.

So many couples are brought together by a shared interest, and I picture this as adorning a cake for beer aficionados. DeafDog's bottle caps saying "I {heart} U" will highlight both your love for each other and your enthusiasm for life's pleasures.
Whatever animals you might choose to represent yourselves, Smallest Friend can make adorable felted creatures to your specifications. Your pets together, creatures based on your nicknames or favorite pairings (I'm partial to unicorn + narwhal) are all wonderful ways to bring charm to your cake display.
For something a little more symbolic, a tree is a great representation of the growth of your relationship and looks forward to the marriage together. There are a few different varieties by winsome hollow. Choose which is most like you.

There has been a lot of attention to choosing cupcakes instead of a more formal cake for weddings. Consider an arrangement with all of the cupcakes displayed on a charming plate by May Luk.

Once you've picked out your perfect cake topper (or cupcake decor), on your special day the only thing you'll have to worry about the cake is to smoosh or not to smoosh.


~Kari
http://ikyoto.etsy.com