Hawaii Fashion Diaries (Part I)

Earlier this year I traveled to Hawaii to attend my cousin's wedding.  I travelled light, and packed 2 formal dresses, 2 bikinis; and a few versatile shorts, t-shirts and skirts for the rest of the trip.

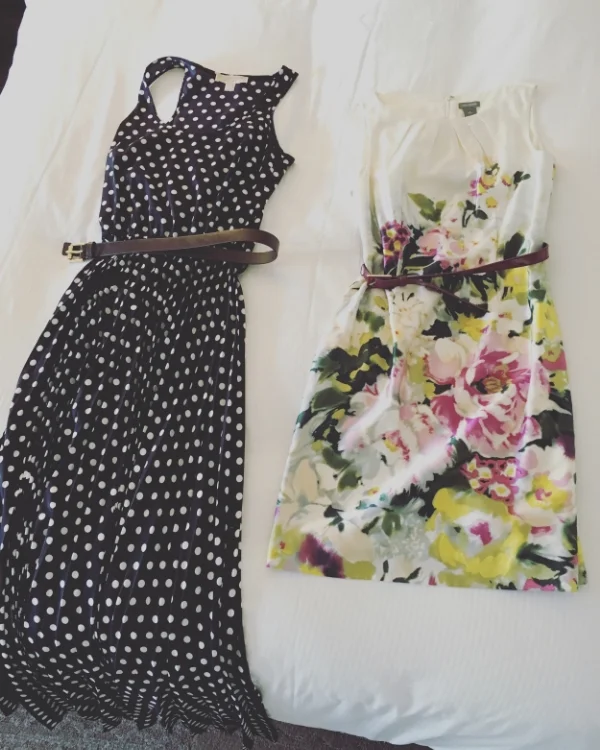
Dresses for the wedding festivities.

I wasn't looking to make much of a fashion statement on this trip, but inspired by its tropical beauty, I left Hawaii with some ideas for a summer wardrobe:

1. never enough blue
Blue never stood out to me more than it did then -- the sky and the ocean provided a vibrant backdrop for every tropical view.  After looking back on photos from the trip, I find blue gives just the right amount of pop without being offensive in brighter surroundings.

(Oahu, HI) by KaiserFenix

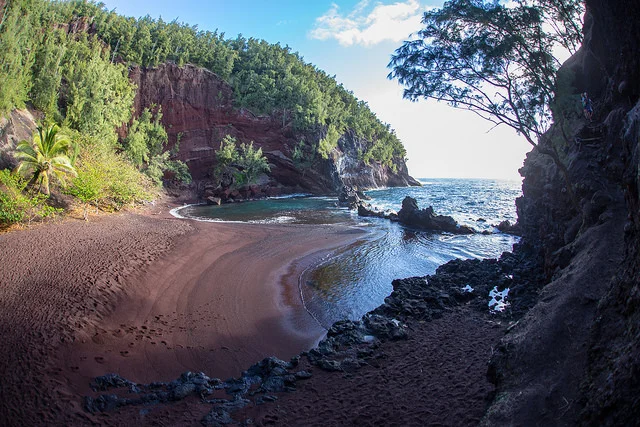
Red sand beach (Maui, HI) by KaiserFenix

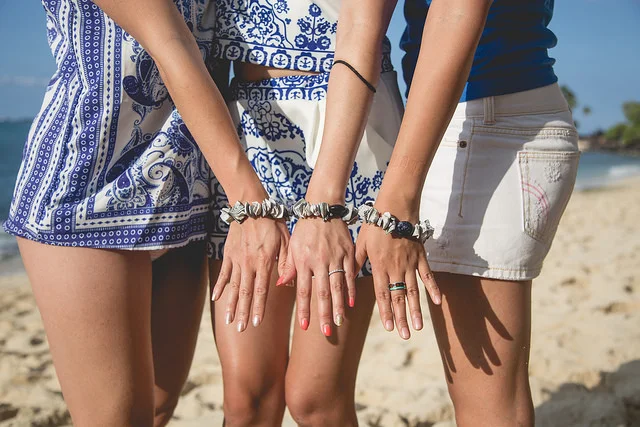
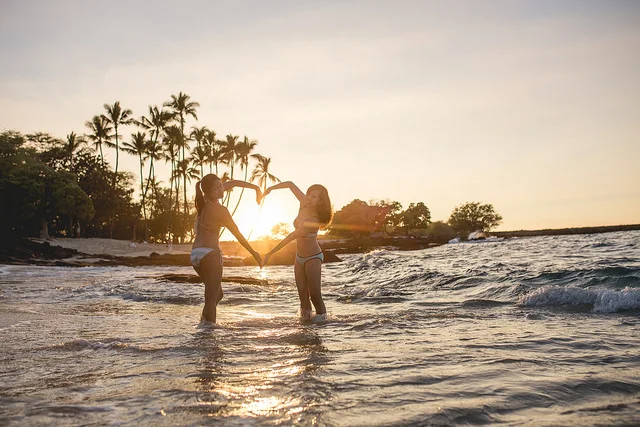
Seashell friendship bracelets and matching blue-white outfits.

2. let the wind in.
It was a pleasantly windy trip.  Normally I am not a big fan of wind, as I am used to the frosty form it takes during the New England winter.  However in the hot climate, I welcomed the warm hug of the breeze.

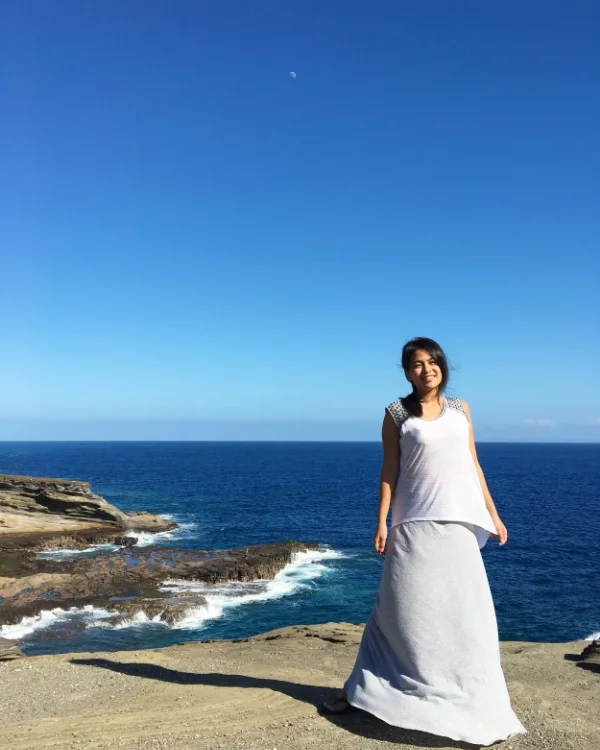
Scenic stop on the way to Makapuu Lighthouse Trail (Oahu, HI)

Luckily for me, I'm going back to Hawaii this Saturday for another destination wedding!  And this time, I've loaded up on the blues and loose flowy pieces.  I plan to be even more relaxed and stylish as I adventure through paradise again.  If the weather holds up, I'm looking forwards to sharing pictures with you all soon.

'Made with Love'

(check out @mycutebow for more trip details)

Post by Eugenia || www.moobury.com || Etsy || Facebook & Instagram @Moobury

    Fashion Earmuffs

I Learned to Make Fresh Pasta in Italy

For a recent visit to Rome, Italy, my parents and I reserved an in-home pasta-making and dining class on BonAppetour.com, which I highly recommend doing if you’re traveling outside of the U.S. and want to learn more about the cuisine at your destination and meet outgoing foodies. If you're planning a trip to Rome, click here to find available hosts.

Our gracious host, Francesca, had a wide range of interests and knowledge in addition to offering three different cooking experiences; she is a former IT project manager, trained sommelier, Airbnb host, and artistically inclined. As far as Italian cuisine, what her mother didn’t teach her she discovered through experimentation, classes, and cooking shows on television. Learn more about Francesca and the dining experiences she offers here.

What I found to be the most interesting aspect of the class was Francesca’s association with making pasta to the creativity of shaping clay and working with one’s hands. Pasta is a staple for Italians, yet their attitude towards food in general, its origin, preparation, and presentation, is given the same respect as works of art. Pasta = Life = Art.

We made 3 pasta dishes from scratch with Francesca’s guidance, but since I am limited here to one post on the subject, I will focus on the initial pasta-making and the ravioli.


We began by “making the volcano” on a clean counter top with Semolina flour and eggs.


Throughout the pasta-making process, Francesca reminded us that our hands are our best tools.


As we took turns kneading, she told us to “Put energy into the dough. The best way is to think about someone you don’t like!”


As the dough rested and the spinach leaves steamed, I blended the ricotta with grated nutmeg and parmesan cheese which would later be combined with the cooled spinach for our ravioli filling. In Italy, there are four varieties of ricotta cheese available; made from cow, goat, sheep, or buffalo (water buffalo) milk.


When it was time to begin flattening our dough to form it into small sheets, Francesca instructed that the flattened pasta should look smooth and not have many “holes,” or indentations, in its surface.


After she showed us how to use the machine, the dough sheets needed to be passed through the rollers a few times more, so she encouraged us to “continue on your own.”


We cut circles from the sheets with a cookie cutter to form our raviolis.

A spoonful of the spinach and ricotta mixture went inside each circle, which were gently folded in half, and pressed or pinched shut.


When the making of the pastas was complete, Francesca, her son Francesco, and his girlfriend  took care of the actual cooking and serving while Mom, Dad, and I sipped glasses of an Orvieto wine, selected by Francesa. We all sat down together for a lively conversation and a delicious meal which was the gran finale of a truly fun and memorable experience!

Nancy C. Sampson // The Nancydraws Shop

Yes Museums Can Be Free

The American Folk Art Museum is a free Museum in New York City. Yes, FREE. Art should be accessible to everyone. It would be odd if a museum dedicated to Folk Art wasn't free, but still.

Many people feel that art is out of reach for them. It is expensive to go to major museums, even for artists. Many galleries have a pretentious air to them. But in reality, art is about our world, and is what gets left behind from our cultures. It truly should be open to everyone. 

Right now The American Folk Art Museum has a beautiful quilt exhibition open until June 5th, in addition to their permanent collection. The collection includes paintings, weathervanes, toys, quilts, and furniture made by self-taught artists. 

Thanks for reading A New York Art Adventure written by Sophia Di Vitto from Wine Cellar Jewelry!

Have an Adventure Today!

Post by Sophia Di Vitto from Wine Cellar Jewelry

Desert of the Month: Homemade Funfeitti Cake

When it comes to desert I love a spin on a classic and nothing reminds me of my childhood quite like a Funfetti cake. The fun colors are the same but the recipe and flavor profiles are updated.  This is the perfect desert to be made with friends or kids (always with supervision).

My Adult Funfetti Cake with Cream Cheese Frosting will satisfy both your inner child and adult taste buds. This recipe is a little bit more complicated than my last which was perfect for when you are in a pinch but when you taste it all the extra steps will have been worth it.

Cake Ingredients

Yields 12 Servings plus extra for the crumbs on top

Dry Ingredients:

3 1/3 cups of all-purpose flour

1 ¼ teaspoon of baking powder

1 ¼ teaspoon of salt

2 cups of sugar

½ cup of brown sugar

4 Tablespoons of rainbow sprinkles

Wet Ingredients:

10 tablespoons of unsalted butter at room temperature

1/3 cup of vegetable oil

5 eggs at room temperature

1-¼ tablespoons of vanilla extract

1 ¼ cup of milk (of your choice either cows milk, almond or even lactaid)


Vanilla Cream Cheese Frosting

Yields 3 Cups

 3 tablespoons of unsalted butter at room temperature

12 ounces of cream cheese at room temperature

3 teaspoons of vanilla extract

3 ½ cups of powdered sugar

Directions

1.     Preheat the oven to 350 degrees F and then using non-stick spray coat the bottom and sides of 2 9-inch round cake pans.

2.     Put all of the dry ingredients except the sprinkles into a medium sized mixing bowl and then quickly whisk them to combine.

3.     For this step you can use an electric mixer of a large mixing bowl and a hand help electric whisk. Beat the butter and sugars until they are fluffy. Slowly add the remaining wet ingredients except the milk. When adding the eggs do one at a time and let them incorporate before adding the next.

4.     Pull out your pre-mixed bowl of dry ingredients and using a measuring cup slowly add them to the wet mixture. If you are using a stand mixture this can be done while it is going at a slow speed but if you are using an electric whisk you should stop, add the ingredient and then whisk until they are combined and repeat thee steps until all the dry ingredients have been incorporated.

5.     Finally add the milk and mix until the batter is a smooth creamy texture. Turn off your mixer or electric whisk and add your sprinkles while using a spatula to gently fold them in so there are sprinkles through out the cake.

6.     Pour your batter into your two sprayed pans filling them ¾ of the way and place them in the preheated oven. These cakes should cook about 30 to 35 minutes and are done once they are golden brown and a toothpick can be stuck in the middle and come out clean.

7.     Remove the cakes and let them cool before removing them from their pans to continue to cool on racks. Once the cakes are at room temperature or cool to the touch you will begin trimming the tops off of each to make them completely flat. When your cakes cooked they should have risen slightly and creating a slightly uneven surface. Carefully using a knife slice this thin layer off from both and leave it to the side to cool and dry out.

8.     After cutting each cake allow them to continue to cool and begin working on your frosting (again either in an electric mixer or in a large mixing bowl with an electric whisk).

9.     Begin by beating your butter, cream cheese and vanilla extract until they are smooth.

10. Slowly add the powdered sugar in the same way you did the dry ingredients above. Add the sugar ½ cup at a time and let it fully combine before adding more. Depending on preference if you think the frosting it now too hard or stiff you can use a little milk to loosen it up but only a teaspoon at a time. Remember to mix well between adding more milk or you will have frosting that it too loose.


Assembly:

1.     Chose a cake plate or base that you want to build your cake on. I like to place a dollop of frosting on the plate first to help hold the first layer.

2.     Place one cake down gently and frost it generously until it the newly trimmed top is completely covered.

3.     Gently place the second cake on top and repeat step two when frosting the top. Now comes decision time, as some of you may remember from my last blog I am not a big frosting lover and have become obsessed with this new trend of “naked cakes” pioneered by Christina Tossi when the sides of the cake are not frosting and show off the beautiful layers you have created. If you are a frosting lover then you may want to continue frosting the sides; this is totally based on preference.

4.     You are almost done now for the finishing touches, take some rainbow sprinkles and dress up the top of the cake but leave room for the cake crumbs.

5.     Take the tops of the cakes you previously trimmed and gently crumbled them up into big and small chunks and sprinkle them on the top and or sides of your cakes, giving it an irresistible topping. Now dig in!

Quick Fruit & Nut Bars

We all have those days where by the time you look up, it’s way past noon and you’re not really sure where the rest of the day went. Today I have an easy recipe for protein packed fruit and nut bars that make an awesome sweet treat when you need a quick snack to keep you go-go-going! 

Here's what you'll need to get started:

  • 2 cups Old-fashioned oats
  • 1 cup sliced almonds
  • 1 cup shredded coconut
  • 3 tablespoons unsalted butter
  • 2/3 cup honey
  • ¼ cup light brown sugar
  • 1 ½  cups chopped dried fruits *I’ve used apricots & cranberries today, but this varies with my mood. Get crazy! Try pineapple, mango, blueberry, apple, anything you like!*
  • Large mixing bowl & spoon
  • 9 x 12 baking pan
  • Cutting board & sharp knife
  • Parchment paper

Lets get started!

  1. Heat the oven to 350 degrees
  2. Line your 9 x 12 baking pan with parchment paper

3. Measure out your oats, nuts and coconut flake right onto your parchment & gently mix them together. 

4. When the oven is ready, toast up your oat, and nuts mix for about 10 minutes to get a little extra flavour and a bit of crunch. 

5.    While your oats are toasting chop your dried fruit (if needed). I like to set out my 1 cup, and ½ cup measuring cups right on the board, and just chop until they are full; adjusting the chop or adding more types of fruit according to whatever suits my mood. Get creative!

6.    Toss your toasted oats, nuts, and coconut flake into a great big mixing bowl with your chopped fruit and mix well.

7.    Lastly, melt your butter, honey and brown sugar in a small saucepan. You can add a bit of lemon zest, vanilla extract, cinnamon or any secret ingredient you want to sneak in here :-p
**This will be the ‘glue’ that holds your bars together, so make sure it’s completely melted and one uniform ooey gooey consistency!**

8.    Once melted, pour your delicious honey/butter gooey "glue" over your granola mixture and fold it all in until all the delicious ingredients are thoroughly coated. 
9.    Spoon the mixture into your pan, lined with the same parchment (waste not want not!). Using the back of your spoon press the mixture into all the corners of the pan. If it’s too sticky, dampen your fingertips and use those!


10.    Bake for 25-30 minutes, or depending on your oven, until the edges are that yummy golden brown

11.    Remove from oven and let cool for at least an hour (The hardest part in my opinion). When that timer goes off, lift the parchment straight up and place your granola on a sturdy cutting board. With a nice sharp knife cut into bars or smaller squares for mini snacks.  

Lastly. . .best-ly: Devour at will!!! The protein boost from oats and almonds will boost your energy and the fruit and honey is perfect for midday sweet tooth satisfaction :-) Enjoy! 

Post by Coleen Phoenixx

Etsy ° Instagram ° Facebook

A Sunday Stroll, Japan-style

On a perfect spring day in early May, women dressed in yukata strolled amid wisteria and cherry blossoms. The unmistakable sound of a pounding taiko drum could be heard in the distance. Food stalls served rice balls and dumplings. Giggling children folded paper into origami animals. Scenes typically experienced in Japan, but actually in…New York City’s Central Park!

Since 2007, Central Park has hosted Japan Day, an annual celebration of Japanese culture meant to “build bridges of cultural understanding between the people of Japan and the U.S.” (http://www.japandaynyc.org). The day traditionally kicks off with a morning Japan Run, followed by an all-day festival featuring family-friendly activity tents, free samplings of Japanese food, stage performances, and mikoshi parade.  Enjoy this year’s highlights and mark your calendars for next year’s event!

Calligraphy Stage Performance by Seiji Sugiura

Bon Odori Dance with the Japanese Folk Dance Institute of NY

Photo booth featuring Domo, the official mascot of Japan public broadcasting, NHK

The mikoshi, a portable Shinto shrine carried in the festival parade.

Post by: Nicoletta Siccone / ETSY Shop: ArtologieDesigns / Website: www.art-ologie.com