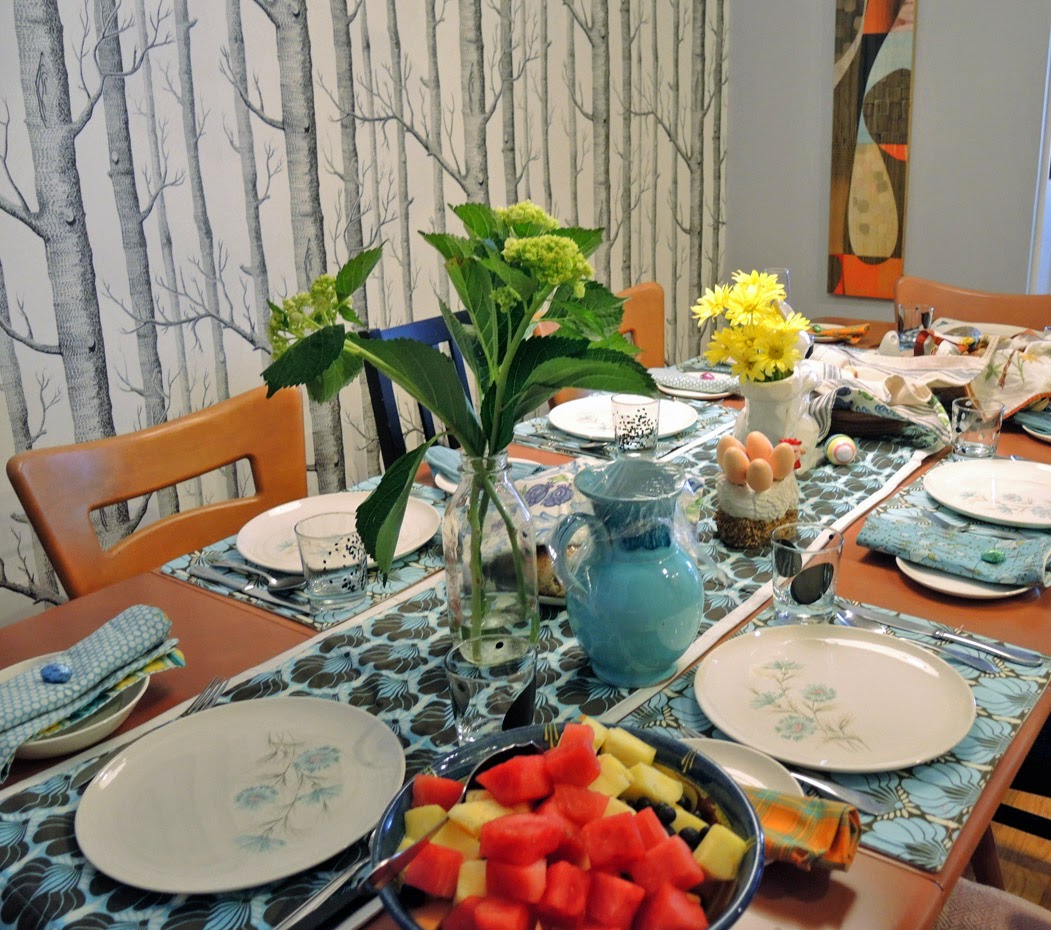
Setting the Table: Sewing 101 Lesson 2

A few weeks ago I wrote about DIY and Setting the Table.

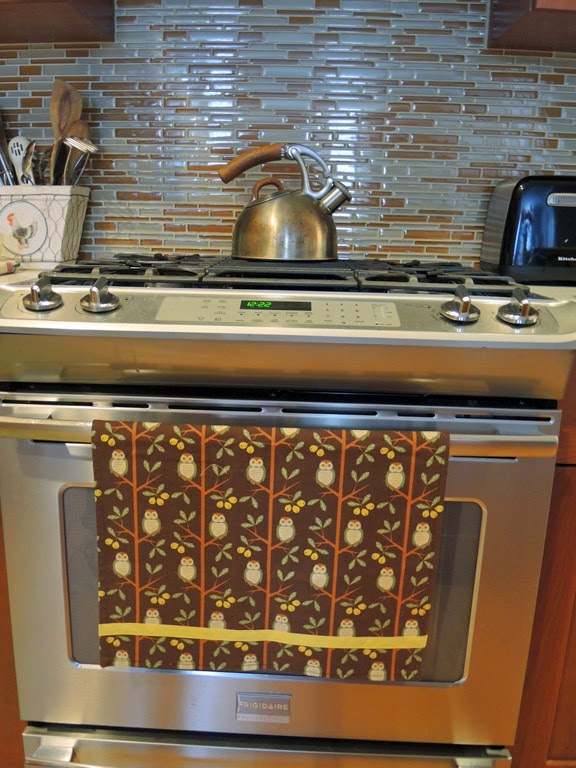
 I taught you how to make a reversible napkin.   In today's tutorial I will teach you how to make a Tea Towel.  I like giving tea towels as hostess gifts.  I usually will give two wrapped up in pretty packaging.  Tea towels are great to use for many reasons.  You can hang them on a stove for decoration.  You can use them on a small table or coffee table for serving hors d'oeuvre.  You can use them in a basket as a bread roll blanket or under a dish rack as a drying cloth.  It is a very multi purpose textile.

In this week's edition of Setting the Table I will show you a quick and easy way to make a tea towel.  Very easy for the beginner.  There is also an option at the end of the tutorial to add a ribbon detail.

Supplies:

5/8 yard of home dec weight or medium weight cotton woven or cotton linen fabric

6" of 1/2" or 3/8" wide twill tape or trim (I use a linen cotton webbing)

3/4 yard of 5/8" wide ribbon or twill tape for decoration (I use a ribbon called Fettucia

from Purl Soho)

Pre-wash all fabric.

1. Cut a piece 20" wide and 28" long

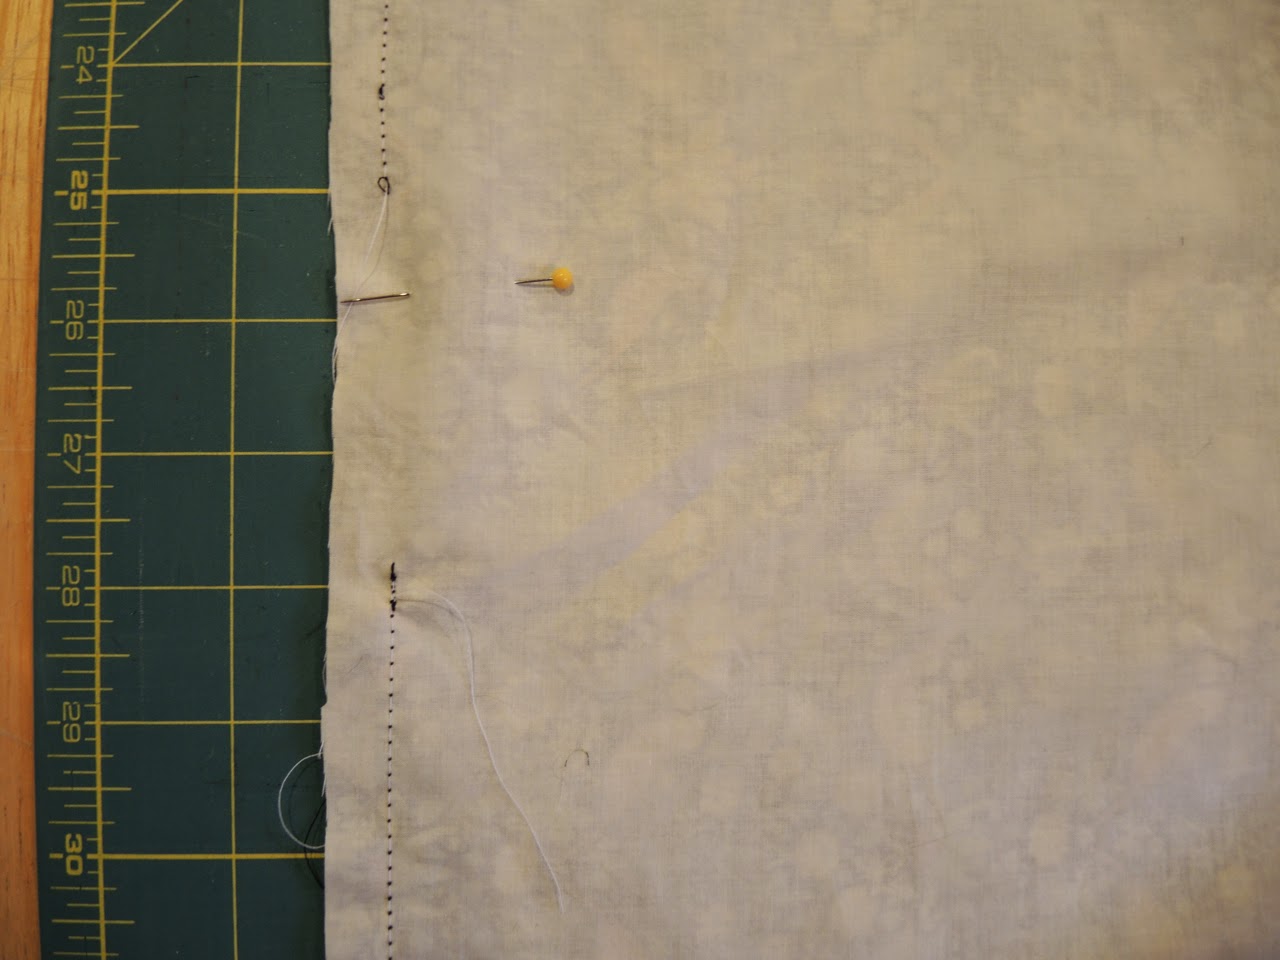
2. fold all 4 sides in at 1/2" and press

3. fold in again 1/2" seam allowance and press.  I press with the pins in to hold down the fabric for me. You can pin the pins all the way but I just push them into the ironing board. If you are more comfortable you can pin the seam allowance completely.  Once you press it with steam, the seam allowance should stay flat without the assistance of the pins.

(note: pressing is with the iron on steam)

5.  Cut 6" of your thinner webbing or ribbon for your hanging loop.  My fabric has a directional print, there is an actual top.  Fold your webbing in half.  At the top of my towel on the shorter side and 1" in from the side seam place the raw edges of the loop under the seam allowance and fold towards the top so it overlaps the top edge and pin in place.

Now sew a 3/8" seam allowance.

4. Sew all four sides at once, pivoting at each corner.

(note: Pivoting is sewing down one side to the corner, leave the needle in the fabric and lift presser foot.  Turn your fabric, place presser foot back down and sew the next side. There is no need to back stitch since this is one continuous seam.)
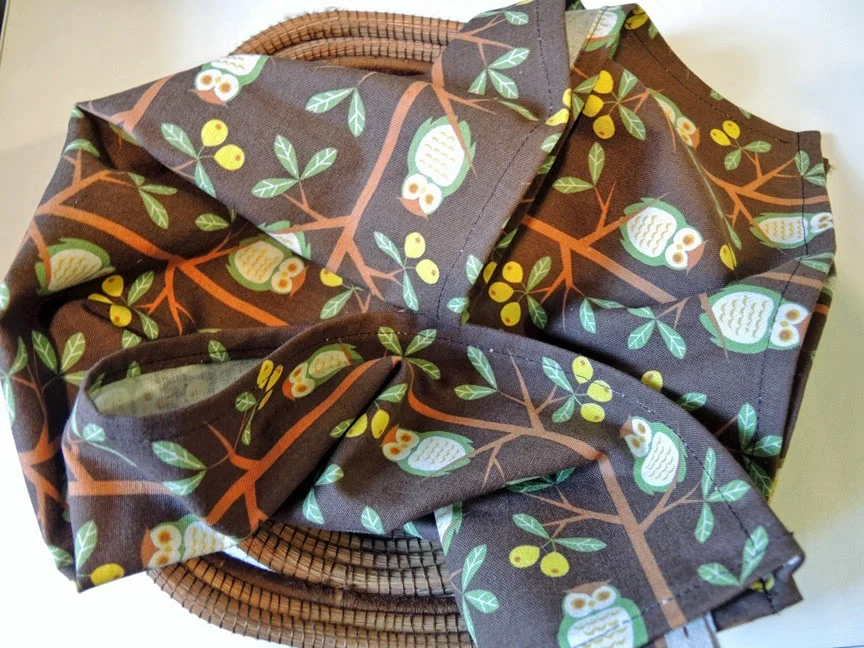
5. Press.  Finished!

Now an optional decoration is adding a ribbon, rick rack or pom poms to your tea towel.  You will need 22" long of trim. (Or 25" if you want to make a loop on one of the sides, read step 7).

I used a beautiful yellow ribbon called Fettucia.

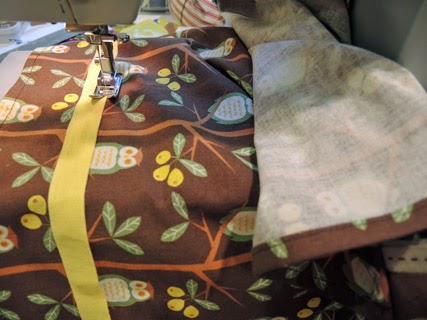
6.  2" from your bottom fold place your ribbon with 1" overlapping each long edge.  Pin in place.

7. Fold underneath twice so the raw edge is not shown.  If you want, you can cut this ribbon at 25" long and on one side fold a loop to the back side.  You then have a side hanging loop. This is shown in the photo.

8. Sew an edge stitch, pivoting. Normally you shouldn't have your fabric underneath your arm of the sewing machine.  But in this case since you are pivoting you will need to roll up the fabric when you sew the other side of the ribbon.

9. Press and finished.

If you would like to give this as a gift I suggest making two so buy double the amount of fabric or buy the same amount in a complimentary print.

Happy Crafting!

Thanks!

Tracey  //  http://traceytoole.etsy.com/

Setting the Table: Sewing 101


In New York City most apartments are on the small side.  We live in shoe boxes.  Most of us all live on tight budgets.  And most of us are single and like to go out.  Sometimes though it is nice to entertain, even in our little shoe box.  I used to live in a 300 square foot apartment.  My husband to this day makes fun of it.  It was my bed, my work table, and 3 cats.  Plus a few bookcases here and there.  It was cozy.  It was in Hells Kitchen which is a very fun place to hang out in and filled with history.  Even though I lived in a small studio I still liked to have friends over.  I didn't have chairs or a dining table but we could have drinks and appetizers.  Entertaining is nice, pleasant, cozy and personal.

The next few weeks I will be posting a series of DIY called Setting the Table.  You don't need to be an expert sewist to do these projects but it will help if you know the machine.  

There will be projects for every living situation.  We will start with simple and easy, a napkin.

double sided napkin using Liberty Wiltshire backed with muslin

tea towel  (spoon by Cor Pottery)

tea towel  (spoon by Cor Pottery)

Moving on to a tea towel with hanging loop.

felt octagon coasters (mug by LennyMud )

felt octagon coasters (mug by LennyMud )

Felt coasters

Table cloth

Embroidered placemats

Quilted table runner

table runner and coaster

table runner and coaster

Each above item can be used in any table setting, big or small, casual or formal.  What will determine the feel is what fabric you use.

The first project, the double sided napkin, can be used for every day meals or only when special meals with guests are held.

Materials:

  • For 4 Reversible Napkins
  • 1 yard of 44" wide fabric - quilting cotton, broadcloth, or light to medium weight cotton woven fabric
  • 1 yard of 44" wide
  • 200 count muslin
  •  I use the higher count muslin because it is much softer than regular dress maker's muslin
  • matching cotton or poly machine thread.  I prefer Gutterman brand but Coats and Clark is also good.
  • Size 10 machine needle

All fabric should be pre-washed.

1. You can layer both pieces of fabric on top of each other for cutting.   Cut out 4 18" squares.

I use a rotary knife to make sure I cut a completely even square

2.  Lay one piece of muslin and one piece of your print face to face.  Muslin has no face so just choose one side.  Pin it together.  Sew 3/8" seam allowance on all sides leaving a 4" opening.  When you are sewing the sides continue with one seam,  you will pivot when you get to each corner.  Start your sewing in the middle of one of the seam allowances, so don't start at a corner.  Press with a steam iron.

The face is the nice side. 

Pivot at the corners

 3. Pivoting: Leave your needle in at the corner, raise your presser foot and turn the fabric to sew the next seam.

Leave a 4" opening so you can turn the napkin back to the right side.

Clip corners before turning out

4. Clip corners before turning back to the right side. This reduces bulk and will help you get nice pointy corners.  Use a point turner for this.  I like the bamboo kind.

5. After turning out, press with a steamy iron. And sew around all 4 sides using a 1/4" seam allowance. And press again.

 Finished! Beautiful and soft spring napkins!

The next post will be making a tea towel with hanging utility loop.

Thanks,

Tracey

https://www.etsy.com/shop/traceytoole

DIY: Celebrate Earth day by sprouting your own seeds

Around this time of the year, kids get to learn a lot about recycling, planting and trash clean up in celebration of Earth day. I think it’s important to let them know we must do these things all year around and Earth should be celebrated every day.

So, it doesn’t matter if you do this project on Earth day, this week or next month as long

as your kids experience the joys and wonders of watching their own seedlings emerge. Plus, they’ll get a little lesson on recycling and composting on top of it all!

You will need:

* An empty egg carton (the

molded pulp

ones, not plastic or

polystyrene)

* Potting soil

* Seeds

* Plastic wrap or bag

* Pen or pecil

* Tooth picks and paper to make labels

Tip: to make the germination process a breeze, pick seeds that germinate easily such as beans, pees, carrots, squash, cucumber and pumpkins. Hard to start seeds might not even sprout and you’ll end up having a frustrated kid!

Get started:

1. Separate the bottom part from the lid of the egg carton. Take the bottom part and poke holes in each cell using the tip of a pen or pencil.

Those will be the drainage holes. Place the lid of the egg carton under the bottom part, nesting one under the other. Now you have your seedling tray.

2. Place small amounts of soil in each cell and plant the seeds making sure the seeds are lightly covered by soil (follow package directions)

3. Water each cell. Be mindful not to over water the seeds, a spray bottle comes in handy.

4. Use tooth picks and paper to make labels.

You can also use rocks or clothes pins to label the seeds.

5. Cover your tray with plastic wrap or a bag to create greenhouse conditions.

6. Place the tray by the window and watch your seeds grow! Keep soil watered and remove the plastic wrap when the first leaves appear.

7. When your plants have more than two leaves, separate each cell and plant it directly into the ground (or pot). The pulp that the egg carton is made of will decompose and become

compost

.

Doing this project is a great way to teach kids about the importance of planting and re-planting, recycling and composting. Explain to them why we should plant trees, how you are recycling the egg carton and how it becomes plant food. Let them have fun while you guide them.

Make a photo journal, they’ll enjoy comparing the growth of the plants and making observations later on.

 I know I did when I was little and now I pass the experience on to my kids.

Natasha K.

Prong Setting Tutorial

Spring has arrived and with it comes the obligatory cleaning…sigh. Motivated by the warm weather, I decided to organize my workspace to make room for new projects. As I was cleaning, I stumbled across a pair of tiny white geodes. “These would be great earrings”, I thought to myself…and that, dear readers, was all it took for me to begin my latest project…all attempts to clean were swept aside in order to allow time to set these fair stones into prong settings:

This project assumes basic soldering knowledge as well as access to a soldering station.

What you’ll need:

  • A pair of stones of similar color, shape and size
  • 22g silver round wire cut into six (6) 20mm pieces*
  • Earring posts (without pads) & backs
  • Tiny drill bit or center punch
  • Ring clamp or vise

*The 20mm length is based on the geodes, which are 8mm x 10mm x 3.6mm high. Your length can be modified based on the size of your stones, keeping in mind that excess wire will be clipped off

Step 1: Making the setting

Each prong setting will use three pieces of the silver wire. Bend two into a U shape and place the bends facing one another. Place the third straight piece between the two U’s making sure they touch. Using hard solder, solder the pieces together.  Repeat this process with the remaining silver wire and pickle.

Step 2: Soldering the earring posts

Using a tiny drill bit or center punch, make a divot in the center of each piece where the three wires are soldered together. I lightly taper the soldering end of the post with a file so that it fits into the divot. Using a piece of soft solder, attach each earring post and pickle.

Step 3: Adding the stone

Place the earring post in a vise or a ring clamp. Gently push the prongs up, creating a basket shape large enough for your stone. Place your stone and gently bend one prong up at a time so that the prongs are vertical.

Before cutting the excess metal down, ensure you allow enough of the prong to bend over the stone to hold it in like a claw. Once the prongs are at the desired length, file the ends flat and push each prong over the stone, one at a time using a burnisher or other small steel tool. Hold the stone in place while you do this because it will move. Bending opposite prongs helps during this process.

Step 4: Finishing the prongs

To finish, use a grinding bur to flatten the bent prongs. I chose to oxidize these for contrast, but they are just as beautiful left un-oxidized. Tumble for a little shine or wear as is!

Rachael

www.etsy.com/shop/mezzestudios www.mezzedesigns.com

PS if you have the time we are taking a survey of our readers, it's a quick 10 minutes. https://www.surveymonkey.com/s/QQJZ5WS

DIY: April showers tees

“April showers bring May flowers” or so they say. Well, I say make April showers fun with a rain inspired D.I.Y project. The weather is slowly warming up and my kids are longing for those special hours of outside play. While the clouds resisted to cooperate, we spent some time creating these great t-shirts. Kids love getting crafty, so take your little ones, nieces, nephews or cousins (or just your inner child!) and gather your supplies!

You will need:

* A pre-washed t-shirt

* Freezer paper

* Acrylic paint in colors of your choice

Textile medium

* A foam or spouncer brush

* Exacto knife

* Cardboard

* Surface for mixing colors (I use the cover of a take out container)

* April Showers stencil

1. Make your stencil. Click on the link to get the April Showers stencil. Cut a piece of freezer paper to  fit the image's 8.5" x 11" size. Feed the piece of freezer paper through the printer manually as you print the image, making sure the artwork gets printed on the dull side of the paper. Carefully cut out the drops and cloud shapes with your exacto knife. You have made your stencil.

2. Iron the stencil onto your t-shirt. Place the stencil shiny-side down on the center of the t-shirt and press with your iron on the hottest setting. Do not use steam.

3. The part the kids love, mixing colors and printing! Mix 2 parts acrylic paint/ 1 part textile medium. Textile medium is great because you can use acrylic paints to paint, stamp or print on fabric without having to spend a big budget on textile inks and your project will be washable. Place the piece of cardboard inside the t-shirt, under the stencil, so that the paint doesn’t transfer to the back. Take your sponge brush and dab it on the cloud area. Make sure you cover the whole thing. If you’re letting kids do this part, let them have fun while guiding them.

4. Move on to printing the drops. Mix different colors and dab your sponge brush. For lighter colors, you may need two coats of paint. Let the first coat dry before doing the second one.

5. Let the paint dry for at least an hour or so. Gently remove the stencil off of the t-shirt. Your stencil can be re-used a few more times so don’t throw it away!

6. Heat set the design on the fabric. Using your iron in the hottest setting, iron over the printed area for 20-30 seconds. Do not use steam. Wear and enjoy!

My kids are very happy with the results and are proudly saying “I made this”. Now they’re thinking to make them as gifts for all their friends but I’m not so sure about that... Remember to supervise children while doing this project, only adults should do steps. 1. 2. and 6.

Have fun and please share pictures of your April showers tees!

Natasha K.

*on Etsy*

*on Facebook*

Crafty Changes in the New Year

Last night while grocery shopping Harper threw one of her toys out of the stroller.  I didn't realise it immediately so we started going up and down every aisle retracing our steps.  I asked an employee and a customer overheard me.  Her and her daughters saw the little squeaky penguin toy.  However it wasn't where they saw it.  I was pretty bummed because this was a gift from her Uncle in Australia.  I guess I just need to get use to this happening.  Harper and I continued to go thru every aisle and this woman and her daughters also helped us.  Her daughters found it on a shelf and started waving to me from the other end of the aisle.  I was so happy.  I think I was so happy not only because they found it but also they were so sweet and helpful.  I think it may be contagious, maybe it's just in us, that feeling of renewing and wanting to be better at the beginning of the new year.

It's absolutely freezing today in most of the country.  Here in Brooklyn it is a chilly 4 degrees.  But it's the new year so let's talk about change.  I personally celebrate my new year on my birthday in September.  However the new year always makes me reflect and ponder.  It's not a bad marker to try and make changes, even small ones.  I asked on my personal facebook page if any one had suggestions for resolutions or if they were making any changes.  I got a few answers that I really liked.  A friend and roommate from college who is now a teacher of second graders suggested minimal but meaningful.  I do think if we make huge, mountainous promises to ourselves then they are harder to achieve.  We let ourselves down and just feel bad about it.  Minimal but meaningful.  Picking up crayons if someone drops them.  Helping someone be a better reader.  These are second grader suggestions but really applicable to all of us. Or maybe just starting to floss your teeth, a minute out of your day.  Thanks Jim Shepherd.

Minimal but meaningful, open the door for someone, offer your seat to the elderly person or pregnant woman on the subway or simply say good morning to someone on  the street.  It's really not that hard.  It might make you happier.

How about something bigger? Something for yourself? Set a goal? My goal is that I want to take a photography class and get my website up. So I have been checking out places for the class.  Ever since my place of employment, 3rdward, closed, I have been looking for other places to take classes.  There are definitely plenty to choose from.

The Brooklyn Brainery - Prospect Heights, http://brooklynbrainery.com/  check out their grab bag classes. My fave thing: classes under $50!

The Textile Arts Center - in Manhattan and Brooklyn (Gowanus)  10% off Book Art Class. Other classes offered are weaving, basket making and youth after school programs.

Make Workshop - 195 Christie St in Chinatown/ Soho.   Needlepoint, draping, quilting, sewing, shoemaking.

Brooklyn Craft Company - 61 Greenpoint Ave Greenpoint Brooklyn.  Fun classes include terrarium making, cookie and cake decorating, and coming up on January 15th perfume making!

Skillshare - 25% off classes until January 10th, project based classes, check out DIY Audio Mixing

Kollabora - mostly craft classes online.  You can learn to make a project and share it!

I hope you found something interesting or inspiring in this post and I hope you are having a great start to the new year!

Take a class, learn something, it will make you feel like a better person!

Stay Crafty!

Tracey

https://www.etsy.com/shop/traceytoole