Crafty Inspirations

Before I started crafting, I frequently visited craft shows to marvel at things that I thought I could never create. Fast forward years later, I am actually making and selling handmade soaps in my etsy shop Nordea Soaperie!

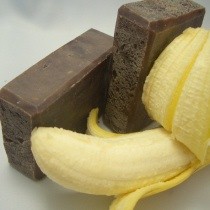
I always wonder what drives a person to choose their craft, and what inspires them to create on a daily basis. I know that I am inspired by my love of food...as strange as that sounds. I LOVE food, and I love to cook. Making soap is simply following a recipe, and I am always thinking of different ways to incorporate food and beverages into my soaping projects. Many of my more popular soaps include fruit purees or liquids like aloe juice and beer.

I asked another member of the EtsyNY team what inspired their crafty creations, and Alison from Koto Designs gave me the following answer:

"I would say that I'm inspired by what I encounter in my day-to-day life. I always have an eye out for anything with a simple geometry that would translate well into embroidery. For example, my brother is a huge bike fanatic and for his birthday I made him a card featuring his super customized bike. I made another (more generic) version for my etsy shop for all the bike lovers out there."

To see the beautiful work from many more members of the EtsyNY team, make sure you come to the annual Holiday Handmade Cavalcade which will be a two-day event kicking off the Holiday shopping season! This show will feature artisans from all over the tri-state area. Don't forget to mark your calendars, December 1 & 2 in Brooklyn, NY....Hope to see you there!

-Nordea

nordeasoaperie

A Family History of Embroidery


Nordea's blog piece on Artful Embroidery (September 19) reminded me of my teenage years when my mother, a crewel embroiderer, taught me some simple stitches. We lived in the middle of Long Island, where there was never enough for kids to do. 

My mom was a craft person extraordinaire. She made braided rugs, like this, for the rooms in our home by going to rummage sales on the last day when a shopper could fill a bag for $1.


She loaded up on wool jackets and pants, cut the material into strips, sewed the strips together at the ends and folded as she went. She braided the folded strips and then sewed the braids into an oval, like this.


The artistry came in blending the colors that would sit next to each other in the rug.


My mom also made pictures from wool thread, called crewel embroidery. She made mostly simple flower and fruit compositions that went with our New England antique furniture: ladder back chairs and butcher tables and pewter sconces and mugs.


Crewel is a style of free embroidery thousands of years old, done on linen or cotton and many stitches allow the sight of the linen through and around the design. These pieces, like the pillow below, she would frame and hang on the wall above the couch in the living room.


Both my parents were painters, as were relatives on my mother’s side. One of them lived in a lighthouse and painted it, as well as other shore scenes. Some painted the farmlands of Hicksville, Long Island in the early 1900s, which is where they lived, on potato farms. My father painted landscapes in oil and my mother used all media for her pieces. She painted well into her 80s, traveling to Italy to live and paint in Rome for a month.

All my embroidery was done on faded blue jeans. 


My masterpiece was a blue jean skirt that I made from a cut up pair of jeans. I put a few flowers on it, like this:


But I kept working on it over time. In the end, it had the feel of this piece:


According to my mother, I wore it every day from Memorial to Labor Day. It had fringe and hanging threads on the bottom. It was not something that could be purchased at the Smith Haven or Walt Whitman Malls, which is where everyone shopped. It was probably the most comfortable thing I ever wore, and I made it. 

WinkandFlip

Artful Embroidery


So, I admit to being a bit obsessed with embroidery. The act of creating art out of thread is very appealing to me. Especially since my drawing skills are not much advanced past stick figures.

I taught myself how to embroider by buying a couple of books and practicing. There are so many different stitches that can be used to create beautiful pieces of art.

I love this card which spells out a cute & clever message with thread. I also love how there are different colors used to create contrast on the white background.


This beautiful flowering tree is a stand alone picture. The embroidery is fantastic, and becomes its own picture frame by hanging it with the hoop! It would be great to hang a few of these clustered together on the same wall.


The holidays are right around the corner...these little Christmas tree ornaments are super cute!

I hope you have been inspired as much as I have! Embroidery is pretty easy once you get the hang of it. What I love most of all, is that it is easy to do on the go....something to pass the time while commuting to work.

-Nordea
nordeasoaperie

What to Do with Scraps of Felt, Part VI: Make a Cuff Bracelet


This use for scraps of felt was inspired by a post I originally saw on Craftzine on how to make a felt friendship bracelet. I saw potential in the general idea presented there of a wide band of felt embellished with embroidery. One fun direction that I thought it could go, and that would help me use some of my very large quantity of felt scraps, was to embellish it not just with embroidery, but also with additional felt, possibly among other things.

Materials
  • A strip of felt that is at least 3/4" wide and as long as needed to encircle the wrist of the wearer-to-be with a little gap between the ends, and a minimum 1" allowance on each end (sorry if that's confusing; illustrative pictures to follow!)
  • Smaller pieces of felt
  • Embroidery floss
  • Thread (optional, as long as you have floss)
  • Sewing/embroidery needles
  • Buttons, beads, or the like (sequins?); maybe even fabric paint
  • Fabric glue (optional)
Steps

Fold each end of the felt strip over at least 1" and pin in place (you'll note that I folded mine over much more; this was because I measured the length of the strip only approximately and used the fold-overs to adjust it).


Using three 18" lengths of embroidery floss, sew the sides of one end of the felt together. Pull the floss through to the middle so that you have the equal lengths of all three strands on either side.

Two down, one to go

Braid the strands on either side of the felt and finish with a knot.


Using a matching color of thread or embroidery floss, sew the sides of the other end of the felt strip together leaving enough of a loop for the braided floss on the other end to be laced through it.


Embellish the felt strip with additional pieces of felt and whatever else.


Lace the braided floss through the loop on the other end of the strip and tie together.


Done!


Until next time --


Tutorial Tuesday: String Art Embellishment

When it was time to decorate a raffle box for the Spring Handmade Cavalcade, I really wanted to take advantage of the existing structure of the lunchbox. After much trial and error, I hit upon the idea of using the stitching holes as the basis of the design. During elementary school, one of my teachers had been in an art project rut that consisted of making string art for every single month. Apparently, time has made it fresh to me again, since I was pleased enough with the outcome to want to share it with you.


String art has its origins in activities invented at the end of the 19th Century to teach mathematical ideas to children, and became popular as a decorative craft in the late 1960s. Though straight lines are formed by the string, the angles and metric positions at which strings intersect give the appearance of curves.

For this project you need:
An item to embellish that has holes in it (holes can be configured as an angle or an arc)
Embroidery Thread
Needle
Glue (optional)

Thread the longest amount of thread that you think you can handle onto the needle (I use my full armspan, so about 5 feet). Tie a large knot and go from the back of the piece to the front at point #1 on the diagram. At this point I also like to add a dab of glue on the knot to keep it in place as well.


Follow the number patterns from 1-20 going from the back to the front on the odd numbers (1, 3, 5, etc.), and from front to back on the even numbers. Keep the thread taut as you go to keep the lines straight and neat. If you run out of thread, knot off on the back, and start again going up at the next odd number with a new piece.
Here is a step-by-step diagram to see how the picture emerges. Red lines are on the front of the piece, and the yellow lines are the shorter stitches hidden on the back. Click on the image to enlarge the diagram.

Now that you've completed the pattern, just knot off on the back, and if add a little dab of glue to anchor it in place.
You may have noticed that the arc that we've made could have continued the rest of the way around the circle. Alternately you could make an asymetrical design by making a different distance between a second set of points 1 and 2. I find that string art is so quick and easy to do (and undo) that experimentation is highly rewarding!
I would love if you could share any ideas or completed projects that this tutorial has inspired you to create in the comments section.

~Kari
http://ikyoto.etsy.com/

Tutorial Tuesday: Make an Iron On Embroidery Transfer

This year, I've been busy transforming photographs into embroidered images. My latest project is this building:

which will soon adorn this bag:

And here is the process:

Materials


  • Reverse image of the picture you want to use
  • Tracing paper (You can use ordinary paper, but tracing paper makes it easier to see the image you're tracing.)
  • Sulky Iron-On Transfer Pen
  • Fabric
  • Iron

Process

  1. Trace your image on tracing paper. It will iron on IN REVERSE. You can use the mirror image setting of your printer to print a reverse image to trace. Once transferred, the image will be correct again.
  2. Lay the tracing paper on the fabric with the ink side touching the fabric. Use a dry iron (no steam) on a cotton setting and iron the back of the tracing paper.
  3. Lift up a corner of the paper to check whether the ink transferred.

  4. Start embroidering.
Note: The pen is supposed to be permanent. So if you don't want it to show on your fabric, you may want to iron it onto some tear-away fabric instead.

You can use this process to create your own embroidery transfers from photographs, drawings, or kid art, and to refresh vintage iron-on transfers where the ink has dried up. Or create your own designs from antique magazines like this embroidery pattern dated 1863 from Godey's Lady's Book, which you can find at the New York Public Library Digital Gallery.

Embroidery ; Night-dress. Digital ID: 828089. New York Public Library


Simone
groundsel.etsy.com