Look Ma, I Can Sew!


This blog post is not so much a tutorial, but more of an inspirational story. I often have big ideas, but sometimes I don't follow through for fear of failure. This time around...I did it!

I purchased an iPad for my birthday last month. I was a bit nervous spending so much money, but it was my birthday after all! While I was checking out, the cashier asked me if I wanted additional screen protection insurance (or whatever it's called). I thanked her, but declined. She shook her head and clearly expressed her disapproval at my decision. I couldn't shake that feeling of dread as I walked back to the subway.

I immediately went online and purchased a hard magnetic cover, but my iPad still felt "exposed" as I carried it around in my purse, so I decided to make a padded sleeve for additional protection. I did a lot of research and found a tutorial that didn't seem too difficult. I have a sewing machine, but never really made something like an iPad sleeve.


I ordered some fabric, batting, a rotary cutter, a cutting mat, a clear acrylic ruler, and got to work!

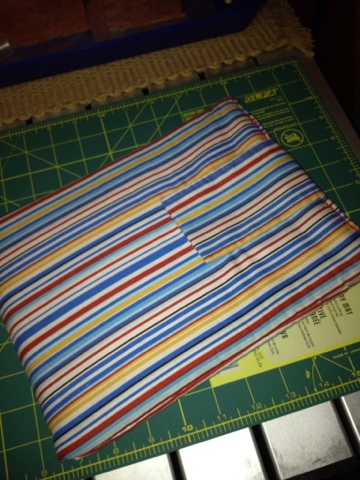
I cut out my fabric carefully, measuring everything with precision. I learned about tacking, squaring up fabric, pinning my hems...lots of things!


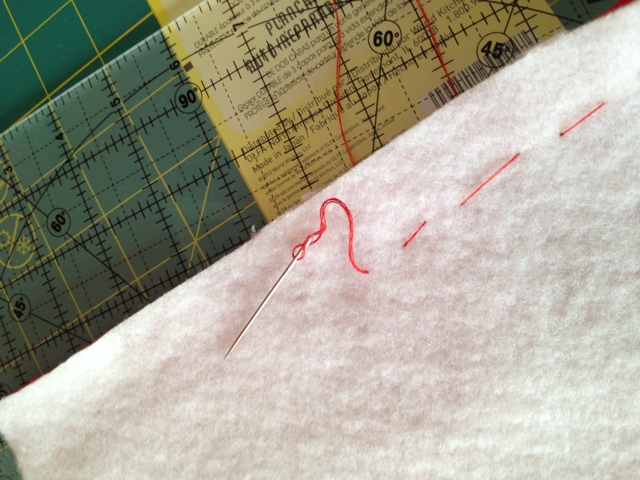
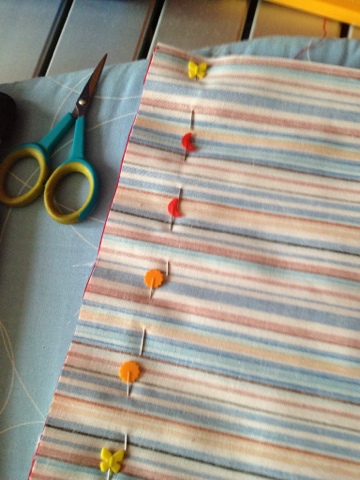
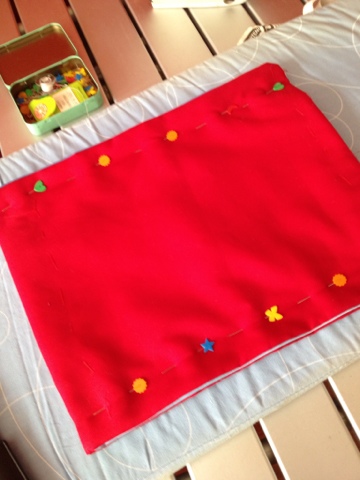
I did have a few issues with finishing the hem, but worked it out. The velcro tabs didn't stick, so I ended up stitching them by hand. I showed the cover to a friend (an experienced seamstress,) and she was impressed with the work I had done. I won't lie and say it was easy. It took me about 5 hours to do, and there were times of frustration, but I didn't give up!


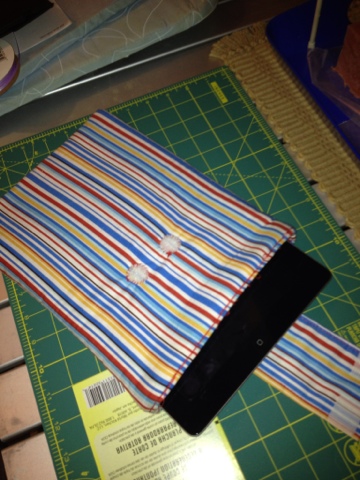
Now, I take my iPad everywhere! Of course, this doesn't guarantee that an accident won't happen, but I feel a bit more relaxed about taking my iPad on the go. My mom just bought an iPad, and I had her pick out fabric so I can make her a sleeve too!

So, I hope you are inspired to attempt a project of your own....happy crafting!

Nordea
nordeasoaperie

Fall 2012: Fashion and Knitwear

I know it's still a bit early, but with all the buzz about Fashion Week in September, I'm starting to get excited about the fall months ahead.  Even though it's still pretty hot and sticky here in NYC, I'm dreaming of crisp fall mornings and cozy knits to wrap myself in.  As I was browsing through the collections from last Fashion Week, I was inspired by all the wonderful fashion knitwear that I was seeing.  Take a peek at some of my favorite looks below!

image via

image via

image via


image via
image via 

image via 

Tell me: Are you still in summer mode or are you ready for Fall to arrive?

By Nnenna of star-crossed smile

Butternut Squash Lasagna

I hate winter. I was born on the wrong latitude for sure. I belong somewhere along the equator. So every year around this time I try to think of things to appreciate in the coming months of cold. It's usually food. Right now I'm consoling myself by thinking about all of the hot soups I'll get to make and all of the winter squash ahead in the farmers markets. This recipe is always a hit for me, and is a pretty easy alternative to the ubiquitous butternut squash soup. I hope you enjoy it!

Ingredients:
Butternut Squash
Lasagna Noodles
Olive Oil
Milk
Butter
Mozzarella (high quality)
Ricotta Salata
Fresh Basil
Nutmeg
Sugar
Salt/Pepper

I never really measure anything for this- it's a pretty easy recipe to just eyeball, which is how most of us cook, I think. Start off by hacking your squash in half and scraping out the seeds (don't forget to save these for roasting later). Then microwave it for about 4 or 5 minutes. This will allow you to cut through the rest, and peel it much easier.


While it's in the microwave, put on a big pot of water to boil for your lasagna noodles. Then, get your squash out and peel and chop it into 1 inch cubes and then throw it into another big pot with some olive oil, and add some water to simmer until it's mushy. I used a 3lb squash, about a tablespoon of oil, and 3/4 cups of water.


While it's cooking, your water should start boiling and you can put in your pasta. I used whole wheat noodles- I think the flavor complements the nuttiness of the squash, plus it's better for you. This is also a good time to preheat your oven to 375, and make sure the middle rack is in place. Next start grating your mozzarella if necessary, and chop up your fresh basil into strips. I cannot overstress that fresh basil cannot be replaced with dried in this dish. It just isn't the same.


Once your squash is thoroughly cooked, sprinkle liberally with salt and pepper, then mash it all up with a fork or potato masher. Grate in some fresh nutmeg to taste and a pinch of sugar (optional). When I made this last time, I was out of nutmeg so I substituted allspice. It was still really good- you could also try cinnamon. Next pour in some milk until it's creamy. I poured about a half cup, but if you want to pour more and then cook it back down that's good too. Think mashed potatoes' consistency. Next, add butter- as much as you want. Let's be honest, the more butter you put, the better it will taste. I put about 2 tablespoons of butter in mine at this point.


Now it's time to fish out your lasagna noodles (Don't take my word on the timing though- set a timer for the noodles according to the box). I set out a towel on the table and laid them out to drain and cool. While they are drying, take a little more butter and coat your casserole dish all around. Now the fun part! Start by putting a thin layer of the squash on the bottom of the pan, then your first layer of noodles, then more squash. Next, put a generous handful of mozzarella, and then a handful of basil. The basil flavor mixes amazingly with the squash, so I put quite a lot, maybe 30 or so chopped leaves. Next, a lighter grating of ricotta salata- this is really a key flavor; its saltiness brings the whole thing together. Repeat this layering until you reach the top of your pan, and finish with extra ricotta salata on top.


Cover the pan with foil and bake for about 40 minutes. Then take off the foil and bake 15 more minutes uncovered to get that crispy brown top layer. Let sit for about 1o more minutes, then slice and enjoy!

Oh, and for a later-that-night snack: take all those seeds you saved at the beginning and put them in a pan over low heat with a little olive oil, a drop of sesame oil and lots of salt. Stir or shake occasionally and let them toast for about 20 minutes. Eat them hot- they are AMAZING.

Jenny

jtopolski.etsy.com

Autumn Plums

I will admit to a bit of a weakness for fashion magazines. My sister collects soda bottle caps and about the only thing you can really get with them is lots and lots of magazine subscriptions. That being said, the fall issues of "Lucky," "W" and "Vogue" have made me a very happy girl when it comes to color pallet.

Previous seasons of grays and pastels and muted neutrals - BLETCH! I hate beige. I'll say it. I hate it, I hate beige. So, I was quite thrilled to see all the gloriously deeply hued and fully saturated jewel tones all over the fall page spreads. Plums and purples are two of the most important, so they say.

The great thing is, especially when it comes to playing with the colors of fall, you don't have to have the latest designer dress--or even dress up! That's one reason I wanted to feature {NewNew} member, KimmChi 's etsy shop. Kimm Alfonso, creator, is a Brooklyn-based artist who uses silkscreening to add strong, bold and abstract designs to American made clothing.

She also has several shirts in gorgeous shades of purple! A personal favorite, accented with an art deco inspired design in pink, is shown here. (A cap-sleeved variation is also available at her Etsy shop.) And don't worry, if purple's not your color, she has plenty of variety, too.


-Izile
Izile's Oddities