Painting on Glass


I use small glass tiles to make decoupage magnets. Perhaps unsurprisingly, not every tile is fit to be used in this way. Scratches, scuff marks, bubbles and occasionally nicks and pock marks mar the glass, and consequently, any image glued to it.


Not being one to throw things away, I've amassed a large number of glass tiles that are unusable as such. But it's not that I have an unhealthy attachment to useless stuff, I really and truly believe I can use these dud tiles, either for something other than magnets, or for magnets but in a different way. With storage space running short and numbers of flawed tiles growing large, I've stepped up trying out different ideas on both fronts.

One of the more successful alternative ways I've used dud tiles to make magnets is to paint them with acrylic paint. Abstract designs and patterns do the best job of obscuring scratches and the like, so I've painted the backs of the tiles with them, just as I would otherwise decoupage them with images. Aesthetically, this trick works pretty well. But in terms of craftsmanship it has at least one fatal flaw: Unlike paper, paint can be peeled off the glass. Even when it's finished with a sealant, it doesn't take more than a few scratches with a dull fingernail to pull the whole design off.

If I weren't making my magnets to sell this might not be a fatal flaw. I mean, who would really try to pull a painted design off the back of glass a tile magnet? Probably no one, but you never know. So I had to work out the kinks.

Leafing through the Dick Blick catalog one day, I happened upon heat-tempered paints. Ah-ha! A solution to my non-sticking acrylic paint-on-glass problem, perhaps! It required re-thinking my magnet-making technique, but hooray, it panned out. Hooray indeed. I love work-arounds. I really do. You have no idea.


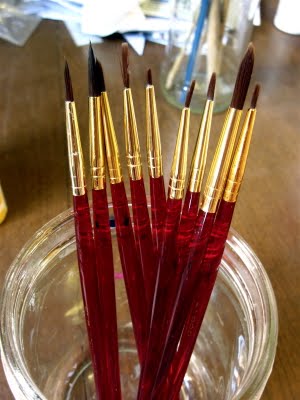
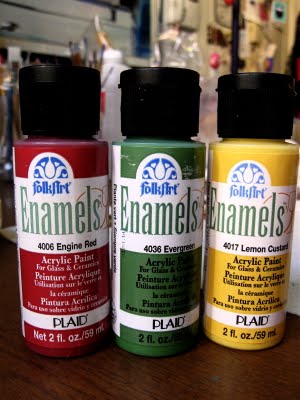
In any case, the re-think entailed shifting the site of the design from the back of the tile to the front. A little more research led me to the paint I chose to work with, namely, Folk Art Enamels. It turned out to be very much like the soft body acrylics I know and love. But there are a few key differences to note for the especially interested: First, Folk Art Enamel dries much more slowly than typical acrylic paint. I messed up more than a few designs before learning this, so resist the urge to add coats or layers of details as soon as you might otherwise. Second, I found that softer bristle brushes worked better for distributing the paint evenly than springier bristle brushes (this may not apply to surfaces that are less slick than glass). Third, which may not be so much of a difference but I think is worth noting anyway, is that in terms of opacity-translucency, the colors I used to paint my glass tiles, at least, tended toward translucency. Bold designs, perhaps on glass in general, will therefore require multiple coats.

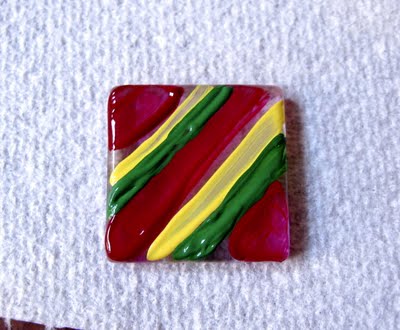
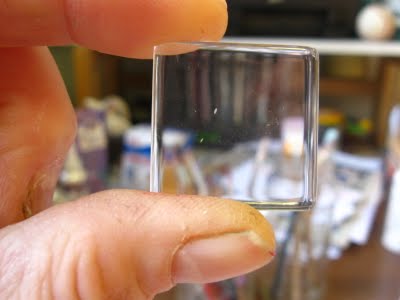
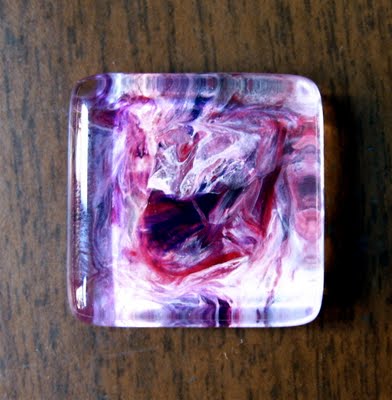
My first painted tile and intro to the opacity-translucency of the paint, visible here in the green and red stripes.
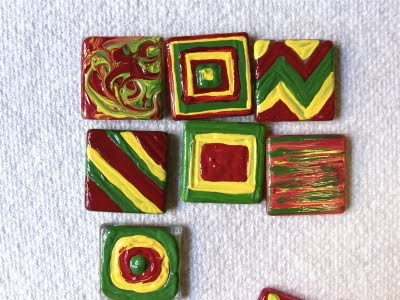
Different kinds of designs.
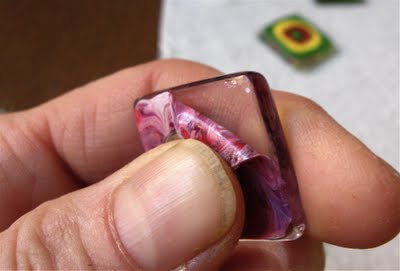
Solid color backgrounds with with dot- or dab-based details worked especially well.

The final key difference between standard acrylic and this paint, of course, is that it's heat-set (you can also allow it to air-dry but it takes 21 days -- ack!). Once you've got your glass all painted up nice and pretty, you bake it in the oven. Neat! For this particular brand of paint, you need to let your pieces air dry for about an hour, then put them in a cold oven, heat it to 350 F, bake for 30 minutes, and allow to cool in the oven before removing.

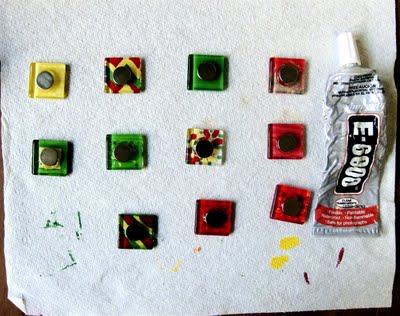
Finished pieces with magnets freshly glued to their backs.

And there you go --- a pretty easy, non-peeling painted-design solution to using flawed glass tiles for magnets --- and probably many other things besides! I shall be experimenting.

Until next time --

Have fun!


Linda

Art For A {NewNew} Office

The worst part about a three-day weekend? Coming back to work!

None-the-less, duty calls. And as I recently realized, just cause you're in an office all day doesn't mean you have to look at bare walls. Whether you're in a cubicle or the corner office, you can always change your view with a digital stroll through (and a few purchases from) all the visual art the {NewNew} has to offer on Etsy.


Jenna Newton makes original art in many different media (pen and ink, paint, watercolor, just to name a few), at different sizes and price points. Whether you need a big painting in your big corner office, or a something slightly smaller scaled -- say cubicle sized -- she's got you covered.


Iris Lavy's shop, ArtbyIris, features both big, color-saturated canvases, as well as smaller-sized prints of some of her pieces.

CLineCreations is all about the Chinese arts in Brooklyn. Her brush paintings will bring a little bit of nature, delicately rendered, into your work space.

prismPOP offers a bold, pop sensibility perfect for a modern office. And if you want something truly personal, send her a hi-res pic and she'll make you a custom POP-portrait.

Randolph Pfaff makes fine art photographs of urban scenes. Just cause you don't have a window, doesn't mean you can't change your view.

PoofNY photog Anne Kristoff offers a lot of different views to choose from in her collections of fine art photography.

And the list goes on! I wish I had more space to list all of the wonderful fine art from the {NewNew} you'll find on Etsy. Where ever or whatever your workspace, look for the {NewNew} to find just the right art for your walls.


-- persuede.etsy.com

How-To: Making a Miniature Artist's Canvas

I have always been obsessed with creating miniature versions of the things I use in my everyday life. I think the extra focus required to make miniature objects imbues the tiny things I make with a special quality--as if they are more charged with meaning than they would be at their regular size. Another reason to spend your time making tiny stuff is that it doesn't take up a whole lot of space, which, if you have friends who live in small apartments and want to give them beautiful handmade things but don't want to burden them with a lot of clutter, is a very good thing!

This tutorial will teach you how to make dollhouse-sized blank artists' canvases from empty tissue, granola bar and cereal boxes, which you can then paint and add to friends' art collections. I am hoping I can spark a whole trendy miniature painting craze!

Here's what you will need:
-empty boxes made from thin cardboard that you otherwise would have tossed into the recycling
-muslin fabric
-white glue
-acrylic gesso
-a normal size brush for applying the gesso, plus teeny tiny ones for doing the actual painting
-acrylic paints
-a gridded acrylic ruler is helpful for making accurate right angles when cutting up your boxes

Step 1: Figure out what size you want your miniature canvas to be. You can just eyeball the size if you like, but if you want it to be the perfect size to fit into a dollhouse, you'll want to do a little math. The standard size for dollhouse accessories is 1/12 scale, which means that you want to divide all your regular measurements by 12. If the full-sized painting would be 18 by 24 inches, then you want to make your mini canvas 1 and 1/2 inches by 2 inches.


Step 2: Once you have cut your cardboard to size, spread it with a thin layer of white glue and stick it to a piece of muslin. Make sure that the sides of your canvas are parallel to the grain of the fabric.


Step 3: Fold the fabric around to the back of the canvas and glue it down.


Make sure the folded fabric edge is glued slightly inside the edges of the cardboard so it can't be seen from the front.


Step 4: When your glue has dried, paint your canvas with a thin layer of acrylic gesso. You want to make sure not to put the gesso on too thickly, because being able to see the grain of your muslin is crucial to having a miniature painting that looks like the full-sized version. If you want to have an especially texture-y canvas, try different types of fabric and see which one looks best.


Paint gesso on the edges & back as well.


That's it! These miniature canvases are so easy and fun to make that you can create hundreds of them in nearly no time, then invite some friends over to have a painting party.


Then you and your friends can have a miniature art show:


Stella (lookcloselypress)